
Getting Started with async/await in SwiftUI
SwiftUI Concurrency Essentials
Without a doubt, one of the biggest announcements at WWDC21 was Swift Concurrency, most notably the support for async/await.
As developers, we’re constantly faced with the asynchronous nature of the apps we write. Reading a file from disk, fetching data from a remote API on the web, and even getting input from the user - all of these are asynchronous operations. Throughout the years, many different ways to deal with asynchronous code have been implemented - most iOS developers will be familiar with Grand Central Dispatch, completion handlers, or delegates.
The new Swift Concurrency model builds on threads, but abstracts away from them.
At WWDC 2021, Apple did a fantastic job at at explaining all the concepts behind async/await and Structured Concurrency. There are no less than 9 videos, plus an entire chapter about Concurrency in the Swift Language Guide, as well as a ton of sample code (in case you haven’t tried it, check out the copy code feature in the Developer app).
But because there is so much information out there, it is sometimes hard to see the forest before the trees.
This article aims at giving you everything you need to write SwiftUI apps that make use of the new concurrency features in Swift.
So - let’s cut to the chase!
The sample app
When looking for an easy-to-use API to for our sample app, I came across WordsAPI.com. It’s a fun API that provides a ton of interesting information about words (in the English language). You send it a word, such as “Swift”, and it will return a bunch of information, such as the different meanings of the word (for example, “moving very fast”, “a small bird that resembles a swallow”, or “an English satirist born in Ireland”).
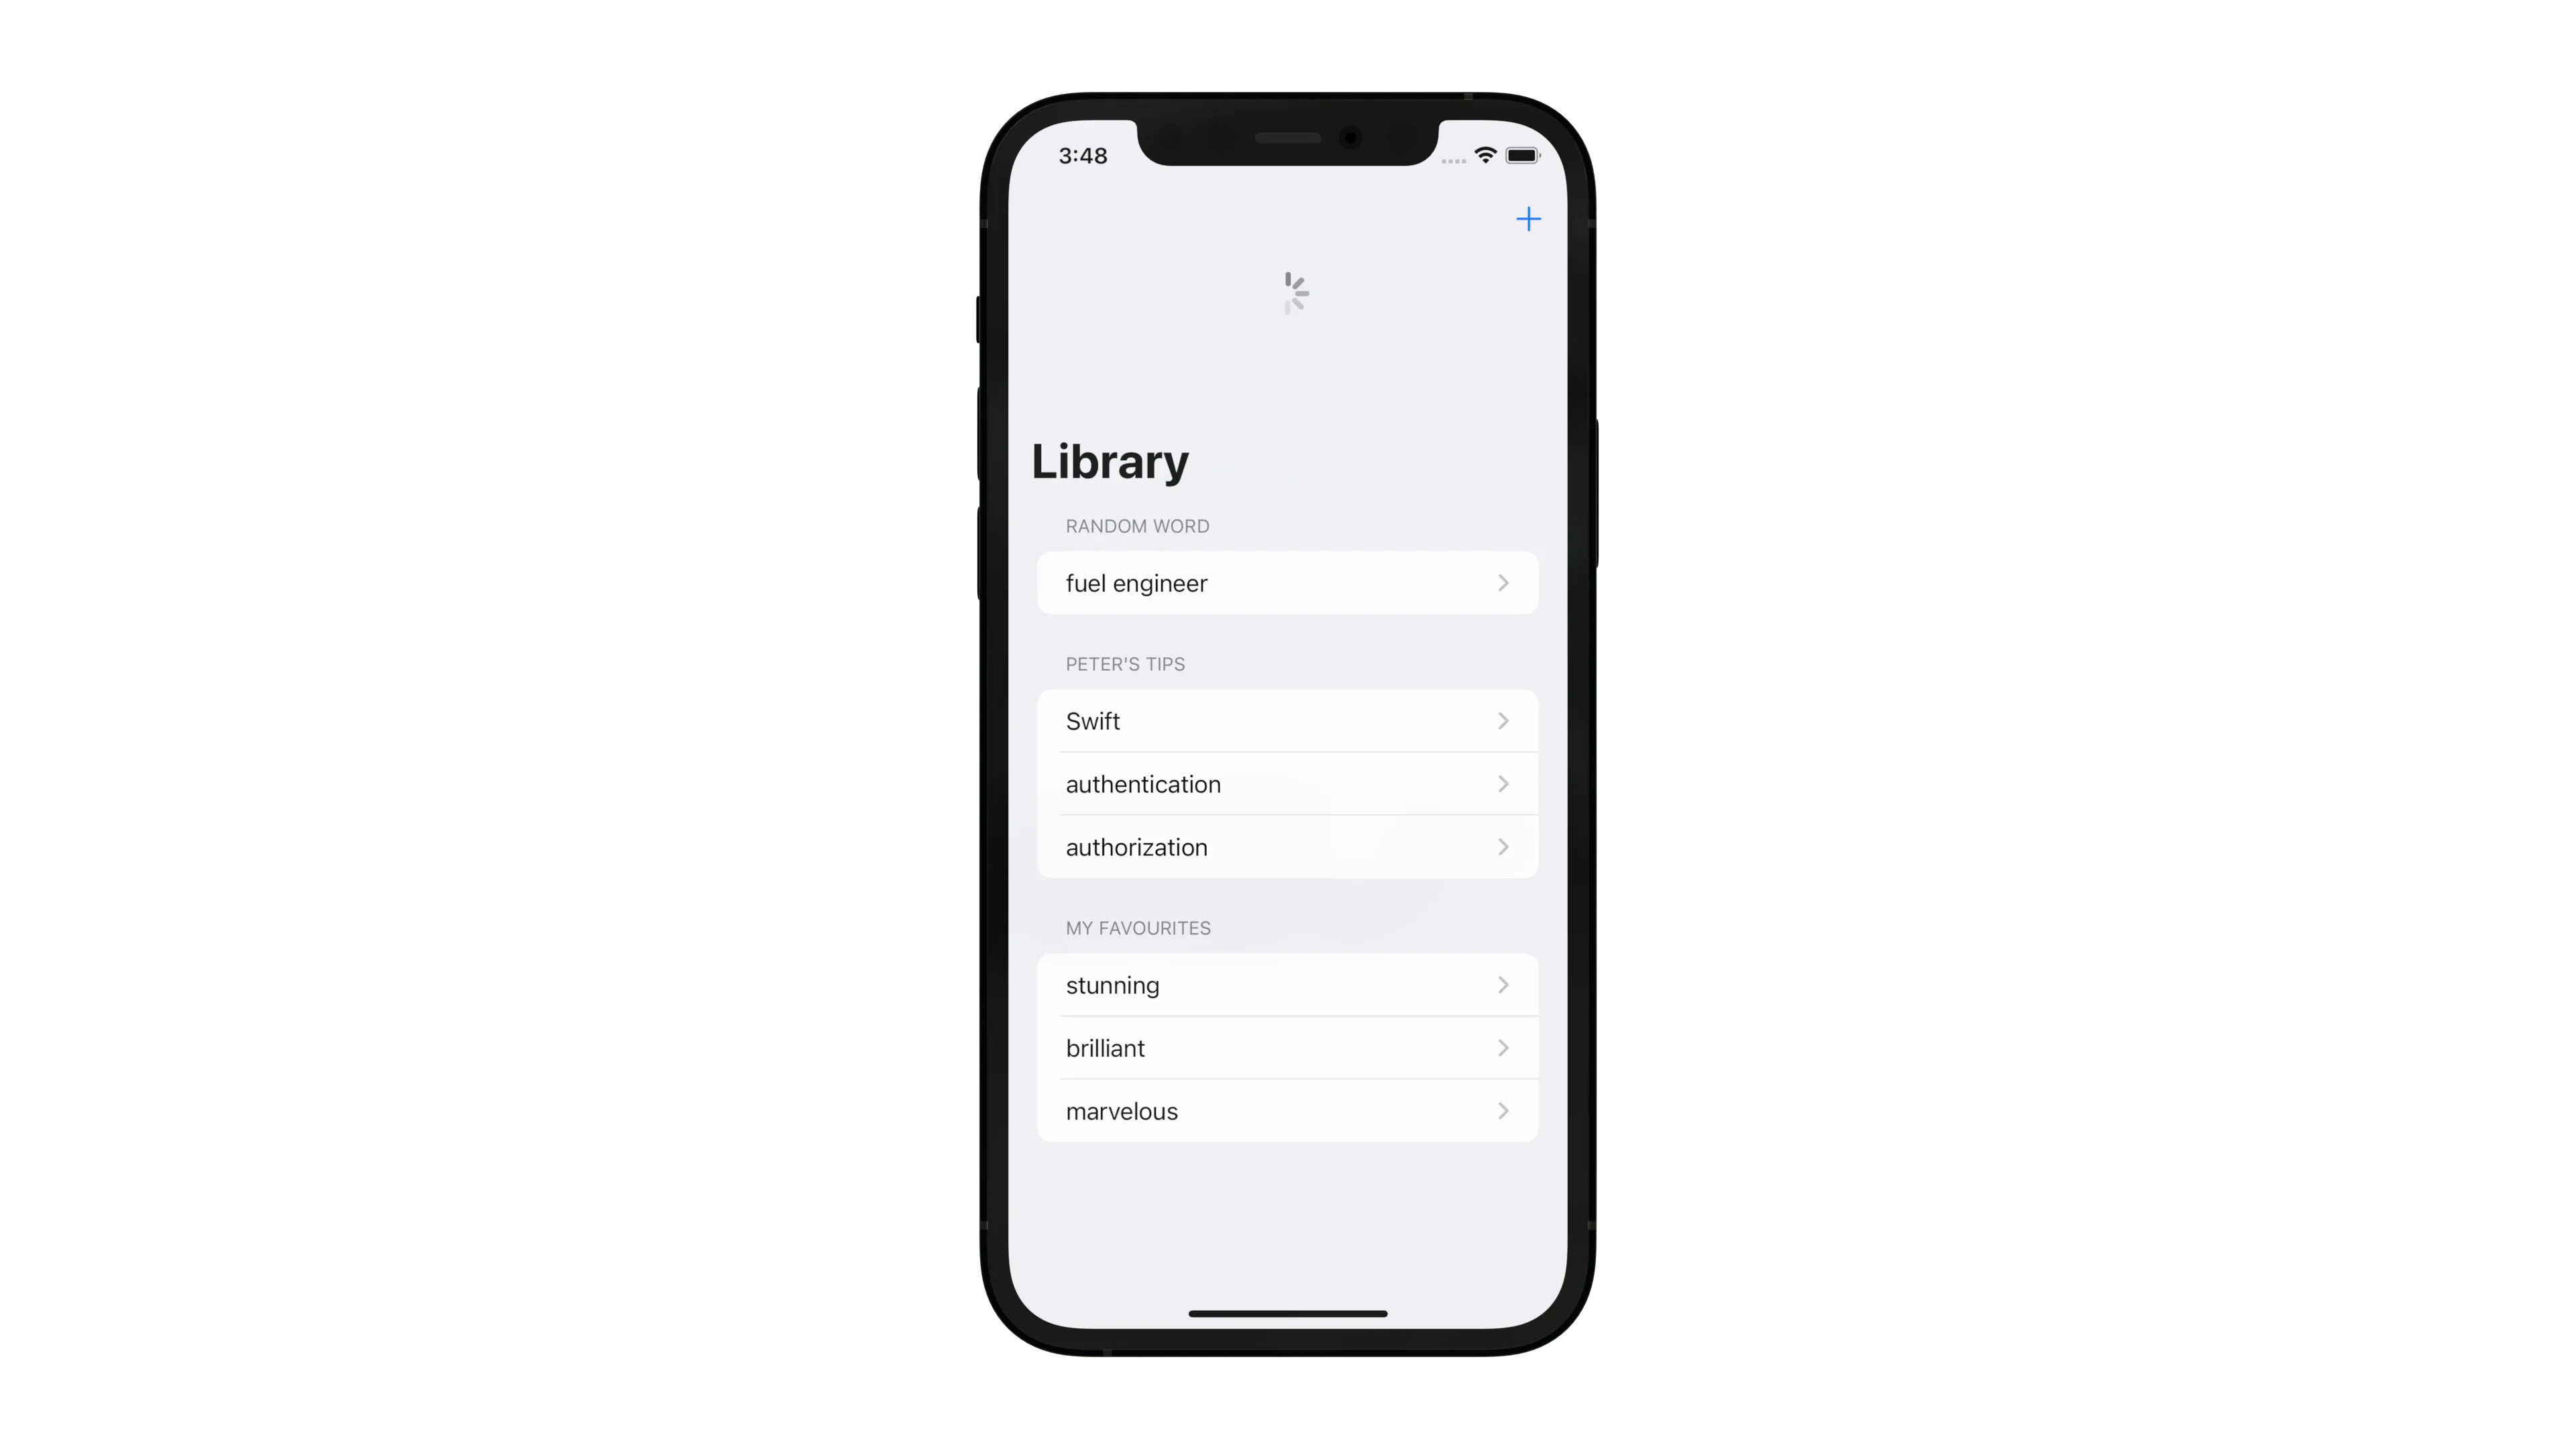
The sample app displays a bunch of words in a List view. When the user taps on one of those words, the app will fetch the meanings of this word from WordAPI.com and display them in a details screen.
Later on in the article, we will add another feature that fetches a random word from WordAPI.com and adds it to the main list when the user pulls to refresh.
Using URLSession and async/await
URLSession is among the many APIs that have been upgraded to support async/await, so fetching data is now a simple one-liner:
let (data, response) = try await URLSession.shared.data(for: urlRequest)With some minimal level of error handling and JSON parsing (powered by Codable), the code for fetching the details about a word looks like this:
private func search(for searchTerm: String) async -> Word {
  // build the request
  let request = buildURLRequest(for: searchTerm)

  do {
    let (data, response) = try await URLSession.shared.data(for: request)
    guard let httpResponse = response as? HTTPURLResponse, httpResponse.statusCode == 200 else {
      throw WordsAPI.invalidServerResponse
    }
    let word = try JSONDecoder().decode(Word.self, from: data)
    return word
  }
  catch {
    return Word.empty
  }
}
Note that we marked our search(for searchTerm: String) method as asynchronous by appending async in the method signature. This means we’ll have to use await whenever we call this method. Doing so indicates a so-called suspension point, and gives the runtime the opportunity to suspend the currently executing function. A suspended function is “put on hold” until the function it called returns. While the function is suspended, the thread it was executing on can be used to execute other code in your application.
Updating @Published properties
The sample app uses a view model to act as a central point for fetching data from the WordsAPI endpoint. It is implemented as an ObservableObject, so it can leverage SwiftUI’s state management system:
struct Word {
  let word: String
  let definitions: [Definition]
}

class WordDetailsViewModel: ObservableObject {
  // output
  @Published var result = Word.empty 1
  @Published var isSearching = false 2

  @MainActor 4
  func executeQuery(for searchTerm: String) async { 3
    isSearching = true
    result = await search(for: searchTerm)
    isSearching = false
  }

  private func buildURLRequest(for searchTerm: String) -> URLRequest { ... }

  private func search(for searchTerm: String) async -> Word { ... }
}
Let’s discuss what’s going on here:
resultis a published property that contains the result of the API call (once this call returns)isSearchingindicates whether we’re currently performing a search. This property will be bound to a progress indicator to give the user some visual feedback that we’re waiting for results.executeQuerymanages the state ofisSearching, and then calls the actual code for performing the API call. Note that this function also needs to be marked asasync, as it callssearch(for:), which is a function that might suspend (as mentioned in Meet async/await in Swift, functions that may suspend, suspend their callers too).- and finally,
executeQueryis marked as@MainActor, to indicate that code within must be run on the main actor.
This last point is crucial: since published properties update the UI, any code that tries to update a published property must be run on the main thread. By marking a function with the @MainActor attribute, the Swift compiler will guarantee that it will run on the main actor. So by annotating executeQuery with the @MainActor annotation, we make sure all updates happen on the main thread.
Note
I strongly recommend using view models, as they help to keep your code clean. However, it is definitely possible to forgo view models and make the search(for searchTerm: String) function a member of your SwiftUI view. To see how you would do that, check out WordDetailsViewNoViewModel in the GitHub repository for this article.
Calling asynchronous code from SwiftUI …
The final piece of the puzzle is how to call our asychronous code from SwiftUI. There are many different places you might call from:
- When the view appears
- When the user taps on a button
- When the user pulls to refresh
- In response to a search request
- Based on a notification
- Based on a timer
Let’s look at a few of these to understand the different mechanisms we can use.
… when the view appears
This is probably the most common time to fetch data, and you might have been using the onAppear view modifier in your existing SwiftUI apps to trigger fetching data. We can still use onAppear, but the compiler will complain that we cannot call an asynchronous function here.

One solution to this problem is to create a new Task:
struct WordDetailsView: View {
  ...
  var body: some View {
    List {
      ...
    }
    .navigationTitle(word)
    .onAppear {
      Task {
        await viewModel.executeQuery(for: word)
      }
    }
  }
}
This works well, but there is an even better solution: because fetching data when a view appears is so common, SwiftUI has a new view modifier that will automatically create a new Task and cancel the task when the view disappears:
struct WordDetailsView: View {
  ...
  var body: some View {
    List {
      ...
    }
    .navigationTitle(word)
    .task {
      await viewModel.executeQuery(for: word)
    }
  }
}
… when the user taps a button
Sometimes, we want to execute asynchronous code in response to a button tap. In Xcode 13b1, most of the button action handlers do not support calling asynchronous code, so we need to create a new asynchronous context by calling async ourselves:
.toolbar {
  ToolbarItem(placement: .primaryAction) {
    Button("Refresh") {
      Task {
        await viewModel.refresh()
      }
    }
  }
}
… when the user pulls to refresh
Pull-to-refresh is another welcome addition to this year’s release of SwiftUI. By simply adding the refreshable view modifier, a view receives pull-to-refresh capabilities. Inside the closure, we can update the data that’s displayed in the view:
struct LibraryView: View {
  ...
  var body: some View {
    List {
      ...
    }
    .searchable(text: $viewModel.searchText)
    .refreshable {
      await viewModel.refresh()
    }
  }
}
… in response to a search request
This year’s release of SwiftUI also brought us the searchable() view modifier - by applying this view modifier to a list view, you get a platform-specific search UI. The first parameter of the view modifer is a binding to a String, which you can then use to drive the search. If you don’t want to use Combine to listen to changes on the search string, you can use the onSubmit(of:) view modifier to react to certain key presses. For example, to trigger the search when the user taps the Search button on their on-screen keyboard (or hits the enter key), you can use this code snippet:
struct WordSearchView: View {
  @StateObject var viewModel = WordsAPIViewModel()
  var body: some View {
    List {
      ...
    }
    .searchable(text: $viewModel.searchTerm)
    .onSubmit(of: .search) {
      Task {
        await viewModel.executeQuery()
      }
    }
    .navigationTitle("Search")
  }
}
As you might have noticed, onSubmit‘s closure isn’t marked as asynchronous, which is why we need to create a new Task using the now familiar Task { } syntax.
Closure
To summarise:
- Use asynchronous versions of Apple’s APIs (if that’s not possible, there is a workaround, which we will learn about in one of the following posts)
- Mark functions that call asynchronous code as
async - Mark functions that update published properties with the
@MainActorattribute - To fetch data when a view appears, use the
taskview modifier - Use the
refreshableview modifier to use pull-to-refresh to fetch data asynchronously - Wrap asynchronous code in a new
Taskwhen calling from a synchronous context, such as aButton
I hope you found this useful. If you’ve got any questions or suggestions, reach out to me on Twitter, or file a pull request on the repository for this article.
Thanks for reading! 🔥

Agentic Coding in Xcode with Gemini CLI
Build apps with AI assistance in Xcode using Gemini CLI

Turn Your Photos Into Miniature Magic with Nano Banana
Build stunning image generation apps in iOS with just a few lines of Swift

Reverse-Engineering Xcode's Coding Intelligence prompt
A look under the hood
Extracting structured data from PDFs using Gemini 2.0 and Genkit

Understanding SwiftUI Preferences
SwiftUI Parent / Child View Communication