Turn Your Photos Into Miniature Magic with Nano Banana
Build stunning image generation apps in iOS with just a few lines of Swift
Google just released Nano Banana, and you’ve probably seen the amazing images you can generate with it. One of Nano Banana’s standout features is image editing, image compositing, and multi-turn image manipulation.
In this blog post, I am going to show you how you can use Nano Banana in your iOS apps to create amazing images from text, and from other images, with just a few lines of code.
An easy way to try out Nano Banana is the Gemini chat app - it contains a couple of cool prompts that help you get started. For example, there is one to turn you into a mini action figure!
First ask me to upload an image and then create a 1/7 scale
commercialized figurine of the characters in the picture,
in a realistic style, in a real environment. The figurine
is placed on a computer desk. The computer is a MacBook Pro 16”,
the figurine has a round transparent acrylic base, with no text on
the base. The content on the computer screen is a 3D modeling
process of this figurine. Next to the computer screen is a toy
packaging box, designed in a style reminiscent of high-quality
collectible figures, printed with original artwork. The packaging
features two-dimensional flat illustrations.
Inspired by this, I created a prompt for generating cozy miniature dioramas - something I’ve always wanted of my own office.
This is great, but you know what’s better than a cozy miniature diorama of your room?
That’s right - an entire collection of them!
So I built an app just for that, and in this blog post I’m going to show you how I built it. If you want to follow along, you can check out the source code from this GitHub repository.
Setting up your project
Before you can use Nano Banana in your iOS app, you have to set up your project:
- Create a new Firebase project on the Firebase console
- Enable Firebase AI Logic
- Download the Firebase configuration file
- and add it to your Xcode project
- Add the Firebase SDK to your project’s dependencies (File > Add Package Dependencies, then insert
https://github.com/firebase/firebase-ios-sdkinto the search bar and click Add Package - Select
FirebaseAIfrom the list of products and add it to your main target, then click Add Package once more. - In your app’s
init()method,import Firebaseand callFirebaseApp.configure().
Setting up the model
Before you can use Gemini, you need to create an instance of the model. Firebase AI Logic allows you to communicate with Gemini models in a secure way - at no time do you have to keep a Gemini API key in your client app. This greatly reduces the risk for exfiltrating your API key. In addition, you can also use App Check to ensure that only your legitimate app can access Gemini via your Firebase project.
private lazy var model: GenerativeModel = {
  let ai = FirebaseAI.firebaseAI()
  let config = GenerationConfig(responseModalities: [.text, .image])
  let modelName = "gemini-2.5-flash-image-preview"

  return ai.generativeModel(
    modelName: modelName,
    generationConfig: config
  )
}()
Nano Banana is just the public name of the model, the technical name is gemini-2.5-flash-image-preview, and it is safe to assume the -preview suffix might be dropped at a future point in time.
I would recommend using Remote Config so you can easily switch to a new model without having to ship a new version of your app to the App Store. I covered this in detail in my livestream Never Ship a Bad AI Prompt Again: Dynamic iOS AI with Firebase Remote Config.
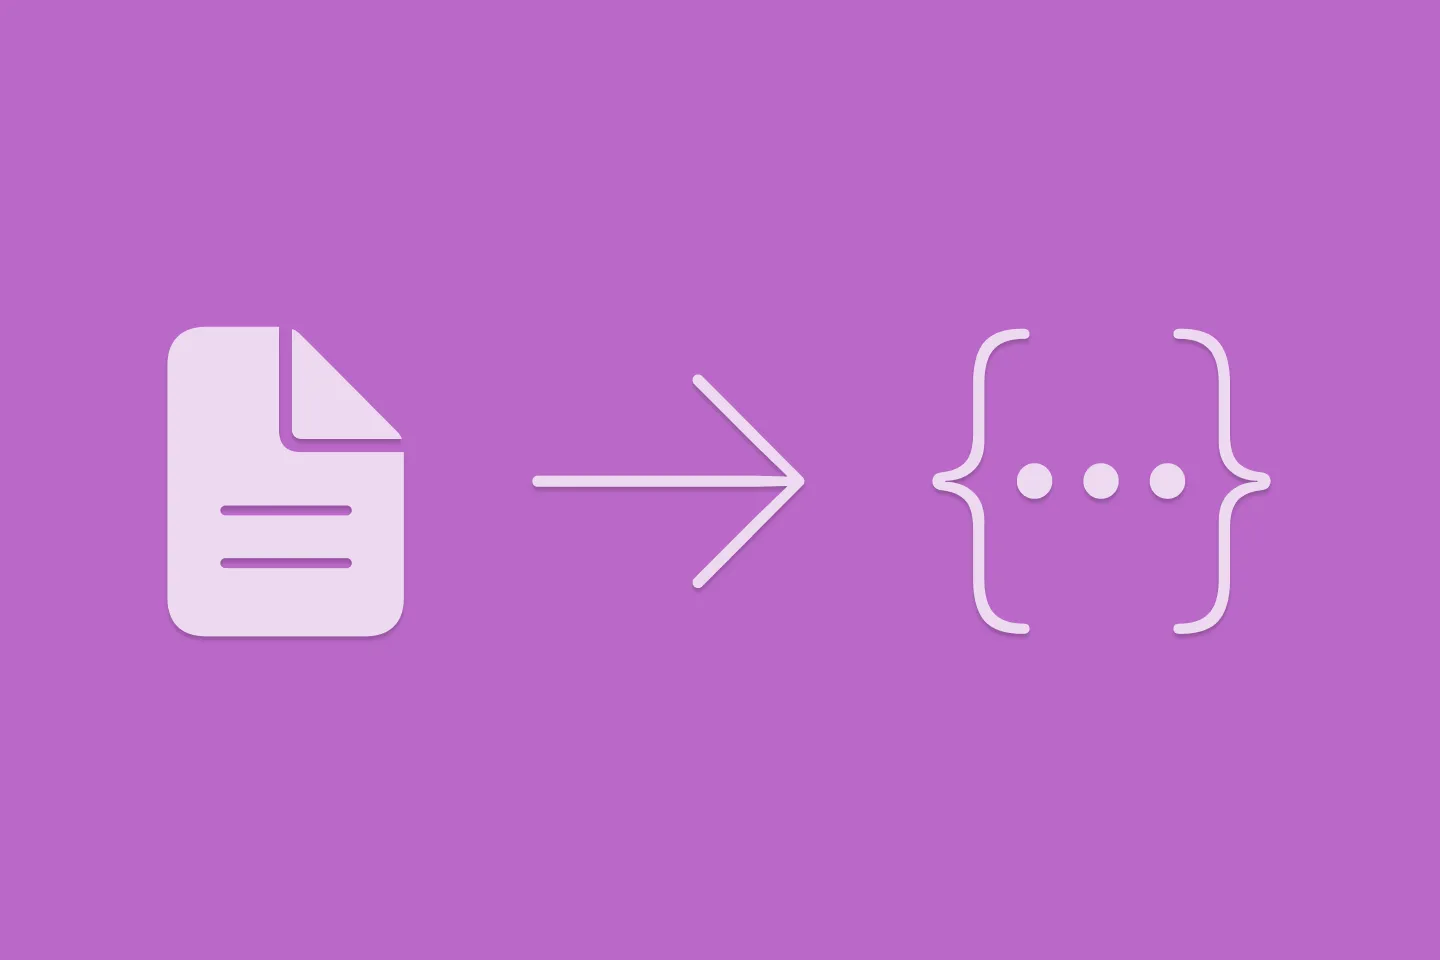
When using Nano Banana, you need to tell the SDK that this is a multimodal model. This is done by setting up the GenerationConfig using the text and image response modalities. Multimodal models return their responses as a structured list of parts which can contain interleaved text and image data. This is pretty useful when asking for a cooking recipe, as the model can return a matching image for each of the preparation steps.
Creating images from text
Nano Banana is capable of generating stunning images just from text descriptions. Based on the prompt I mentioned earlier, here is how you can call Gemini via Firebase AI Logic to generate images:
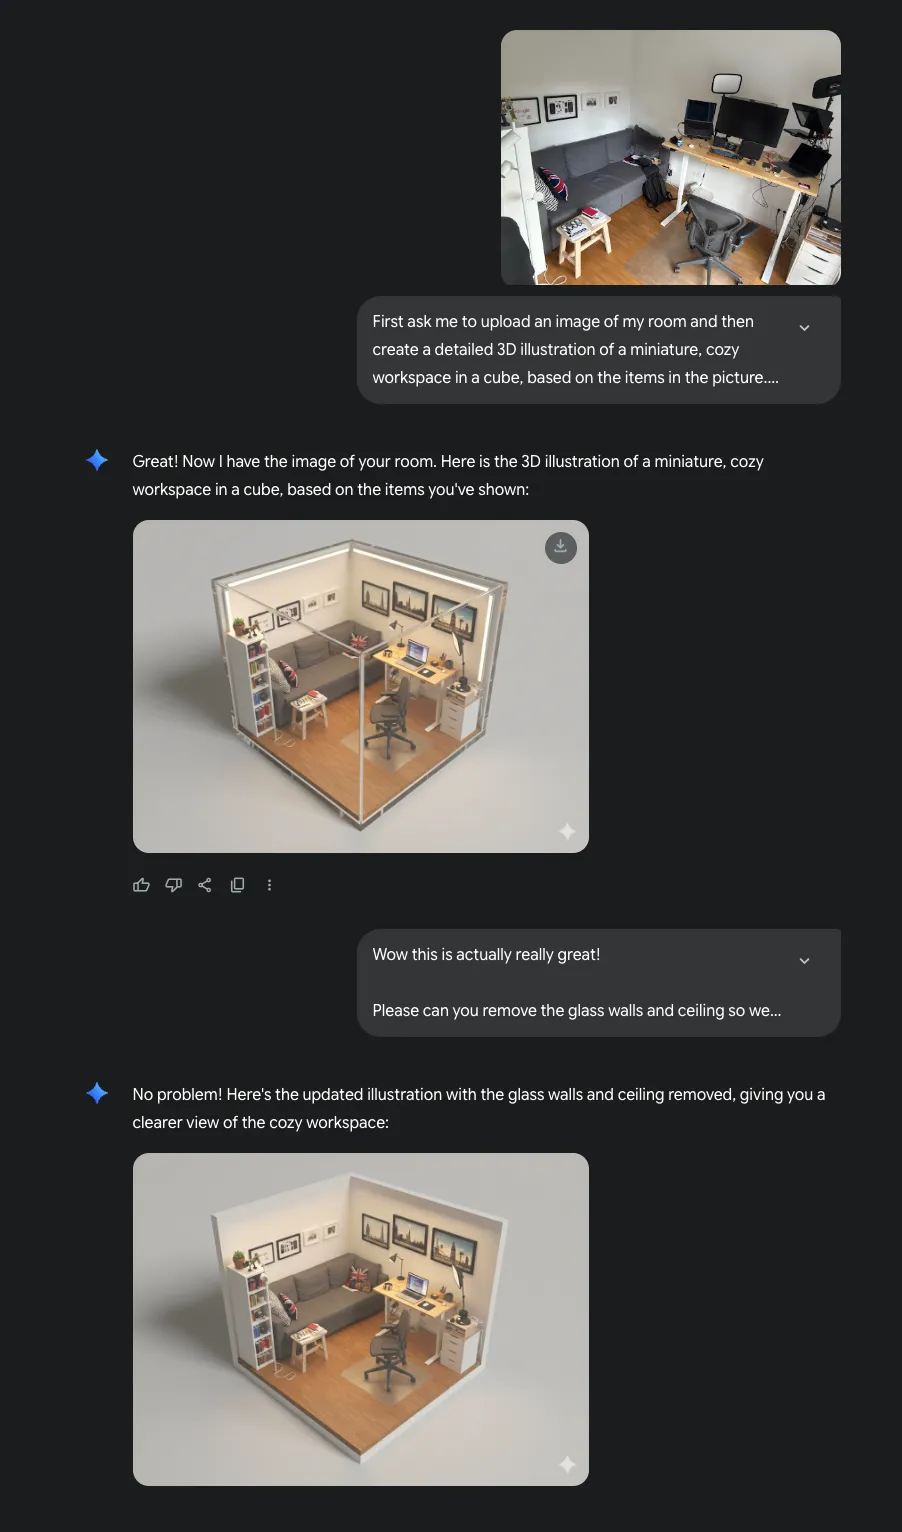
func generateRoom() async throws -> UIImage {
  let prompt = """
  Create a detailed 3D illustration of a miniature, cozy workspace in a cube. \
  The perspective should be isometric, looking down into the room from a diagonal \
  angle. The room should be filled with tiny, charming details that reflect a \
  person's hobbies and personality. Include a wooden desk with a laptop, a \
  comfortable chair, shelves with books and plants, and warm, soft lighting.
  """

  let response = try await model.generateContent(prompt)

  guard let candidate = response.candidates.first else {
    throw ImageGenerationError.modelResponseInvalid
  }

  for part in candidate.content.parts {
    if let inlineDataPart = part as? InlineDataPart {
      if let image = UIImage(data: inlineDataPart.data) {
        return image
      }
    }
  }

  throw ImageGenerationError.missingGeneratedImage
}
We use the for loop to iterate over all the multimodal parts included in the model’s response. Once we’ve found an InlineDataPart, we convert it to an image and return it. If no image is returned, the generateRoom method throws an error.
Creating images from image and text
Generating images from text is quite impressive, but generating images based on a source image is even more amazing. To make this happen, all we need to do is pass an image to the model, alongside the text instructions. The code is remarkably similar to the one in the previous section:
func generateRoom(from image: UIImage) async throws -> UIImage {
  let prompt = """
  Create a detailed 3D illustration of a miniature, cozy workspace in a cube. \
  The perspective should be isometric, looking down into the room from a diagonal \
  angle. The room should be filled with tiny, charming details that reflect a \
  person's hobbies and personality. Include a wooden desk with a laptop, a \
  comfortable chair, shelves with books and plants, and warm, soft lighting.
  """

  let response = try await model.generateContent(image, prompt)

  guard let candidate = response.candidates.first else {
    throw ImageGenerationError.modelResponseInvalid
  }

  for part in candidate.content.parts {
    if let inlineDataPart = part as? InlineDataPart {
      if let image = UIImage(data: inlineDataPart.data) {
        return image
      }
    }
  }

  throw ImageGenerationError.missingGeneratedImage
}
Here is how this turned out for a snapshot of a corner of the music corner in my room. Notice how the instructions in the prompt to generate a workspace and include a laptop, chair, and books are very strong - even though those elements aren’t visible in the photo, the model includes them in the output image.
Analysing images
Wouldn’t it be nice if the generated images looked more like the source image? For example, if I took a photo of a nice bowl of fruit on my dining table, I’d prefer the result to not include an office chair and a laptop…
You might also have noticed that the descriptions of the generated images were hardcoded, so let’s try to generate titles and descriptions that are based on the output image!
Nano Banana isn’t just great at generating images, it can also analyse images - for example, you can ask it to provide a detailed list of items that can be seen in an image.
Let’s take a look at the prompt that makes this possible!
First, we want the model to analyse the input image and determine which kind of room this is (kitchen, study, bedroom, etc.):
**Task 1: Generate Image**
Analyze the provided image to determine the primary room type
(e.g., kitchen, study, bedroom), identify its key furniture,
objects, and decor elements, and grasp the overall mood or style.
Then, we’ll want the model to generate the image based on this room type and the source image:
Then, create a single, highly detailed 3D digital illustration of a *miniature,
cozy version* of that room. It should be meticulously crafted within an
isometric cube, viewed from a diagonal top-down perspective, ensuring all
depicted elements maintain **consistent and realistic miniature proportions
relative to each other within the diorama**, regardless of their apparent
scale in the input image.

The miniature room must incorporate charming, tiny details inspired by
the elements observed in the input image, enhancing its unique personality
and atmosphere. Focus on creating a coherent, aesthetically pleasing
miniature scene where all objects appear in their correct, downscaled
relationships. The lighting should be warm, soft, and inviting, creating
a cozy ambiance.

For the background, use a neutral backdrop that extends into the
distance, making the miniature room the only thing that stands out. The
background should be minimal and out of focus to ensure the miniature room
is the sole focal point.

* **Art Style:** Diorama, claymation aesthetic, whimsical, highly detailed
miniature, octane render, soft focus, depth of field.
* **Negative Prompt:** empty, sterile, messy, dark, distorted proportions,
unrealistic scale, blurry, direct photorealistic copy of input image.
And finally, the model should analyse the result image and return a title, description, and a list of key items that it included from the source image:
**Task 2: Analyze and Describe**
Immediately after generating the miniature room image, analyze its contents and
provide a response formatted *exactly* as follows, with no additional commentary:

Title: [A 3-5 word catchy title based on the *generated image's* theme]
Description: [A heartwarming description of the *rendered miniature image*,
focusing on its cozy details, the soft lighting, and the personality
reflected in its objects.]
Detected Items: [A comma-separated list of the key elements you successfully
identified and incorporated from the *provided input image* into the miniature.]
The generated result will now contain two modalities: .text (with the title, description, and detected elements), and .image for the generated image.
func generateRoom(from image: UIImage) async throws -> (name: String, description: String, image: UIImage, detectedItems: [String], prompt: String) {
  let prompt = """
  **Task 1: Generate Image**
  ... (rest of the prompt as above)
  """

  let response = try await model.generateContent(image, prompt)

    var generatedText: String?
    var generatedImage: UIImage?

    guard let candidate = response.candidates.first else {
      throw ImageGenerationError.modelResponseInvalid
    }

    for part in candidate.content.parts {
      if let textPart = part as? TextPart {
        if generatedText == nil { // Only take the first text part
          generatedText = textPart.text
        }
      } else if let inlineDataPart = part as? InlineDataPart {
        if generatedImage == nil, let image = UIImage(data: inlineDataPart.data) { // Only take the first valid image part
          generatedImage = image
        }
      }
    }

    guard let text = generatedText else {
      throw ImageGenerationError.parsingFailed(missingParts: ["Title", "Description", "Detected Items"])
    }
    guard let image = generatedImage else {
      throw ImageGenerationError.missingGeneratedImage
    }

    let (title, description, detectedItems) = try parseGeneratedContent(from: text)

    return (name: title, description: description, image: image, detectedItems: detectedItems, prompt: prompt)
And now, we get a much better result based on the same input image.
Resources
I’ve compiled a couple of resources that will help you create amazing apps using Firebase AI Logic and Nano Banana:
- The Gemini API documentation provides a good overview of the image generation capabilities of Gemini / Nano Banana
- Refer to the Firebase AI Logic documentation for more details about how to use Firebase AI Logic to call Nano Banana.
- There’s also a great section that discusses limitations and best practices.
- Also check out this blog post for some great tips and tricks for getting the best results when generating images with Nano Banana.
Tips and Tricks
Here are some tips and tricks you might find useful when working with Firebase AI Logic and Gemini models
- When using the Vertex AI backend, make sure to set your region to
globalif you use preview models (whose name ends in-preview):let ai = FirebaseAI.firebaseAI(backend: .vertexAI(location: "global")) - Add
-FIRDebugEnabledto your target’s launch arguments to turn on debug logging in Firebase. Once you activate this, Firebase AI Logic will print out cURL statements for each call you make, including the API key. You can then run these via the terminal, which is super useful for quickly iterating and debugging. Just make sure to turn this off when shipping to production to avoid exposing your API key.
What’s next?
You now have the fundamental knowledge to create and edit amazing images with Gemini 2.5 Flash Image Generation (Nano Banana) in your iOS apps.
What will you build next? Let me know!
Also, go and turn on App Check for your project, for real.
Agentic Coding in Xcode with Gemini CLI
Build apps with AI assistance in Xcode using Gemini CLI

Reverse-Engineering Xcode's Coding Intelligence prompt
A look under the hood
Extracting structured data from PDFs using Gemini 2.0 and Genkit
Understanding SwiftUI Preferences
SwiftUI Parent / Child View Communication